
While we have provided a jump to recipe button, please note that if you scroll straight to the recipe card, you may miss helpful details about ingredients, step-by-step tips, answers to common questions and a lot more information that can help your recipe turn out even better.
Oh my goodness, Homemade No Bake Granola Bars are a game-changer — Homemade No Bake Granola Bars are so EASY and delicious and exactly what you need for busy mornings or snack prep!!! You can make these bars in about 15 minutes of active time and they set in the fridge — perfect for lunchboxes, hikers, and those meal-prepper Mondays when you want something healthy-ish and satisfying. I discovered this recipe on a rainy afternoon in Austin, when I needed crunchy comfort fast (true story, long story, but so worth it), and now I make them every week. Want crunchy? Want chewy? Want something that holds up in a tote? You can do this! Also, if you like pantry-friendly ideas, don’t miss my savory twist in baked cod in coconut lemon cream sauce for dinner inspiration — yes, I link weird things sometimes, but trust me, it’s all about using what you have.
Why You’ll Absolutely LOVE These Bars
You will LOVE these bars. Seriously, you will LOVE them. They’re fast, they’re flexible, they’re reliably tasty, and they travel SO WELL. They’re great for busy families, perfect for picky kids, awesome for meal preppers who want portion control, and forgiving for anyone who forgets a measuring cup sometimes (oops, guilty). They’re not just good, they’re so GOOD, repeat: so GOOD, and you’ll feel proud making them because they look homemade and taste like you fussed — but you didn’t, much. Want gluten-free? Swap oats for certified GF oats. Want vegan? Use maple syrup and coconut oil. Want nut-free? Use pumpkin seeds and sunflower seed butter. It’s all possible. You can totally do this, I promise.
Ingredients You’ll Need (Super Simple)
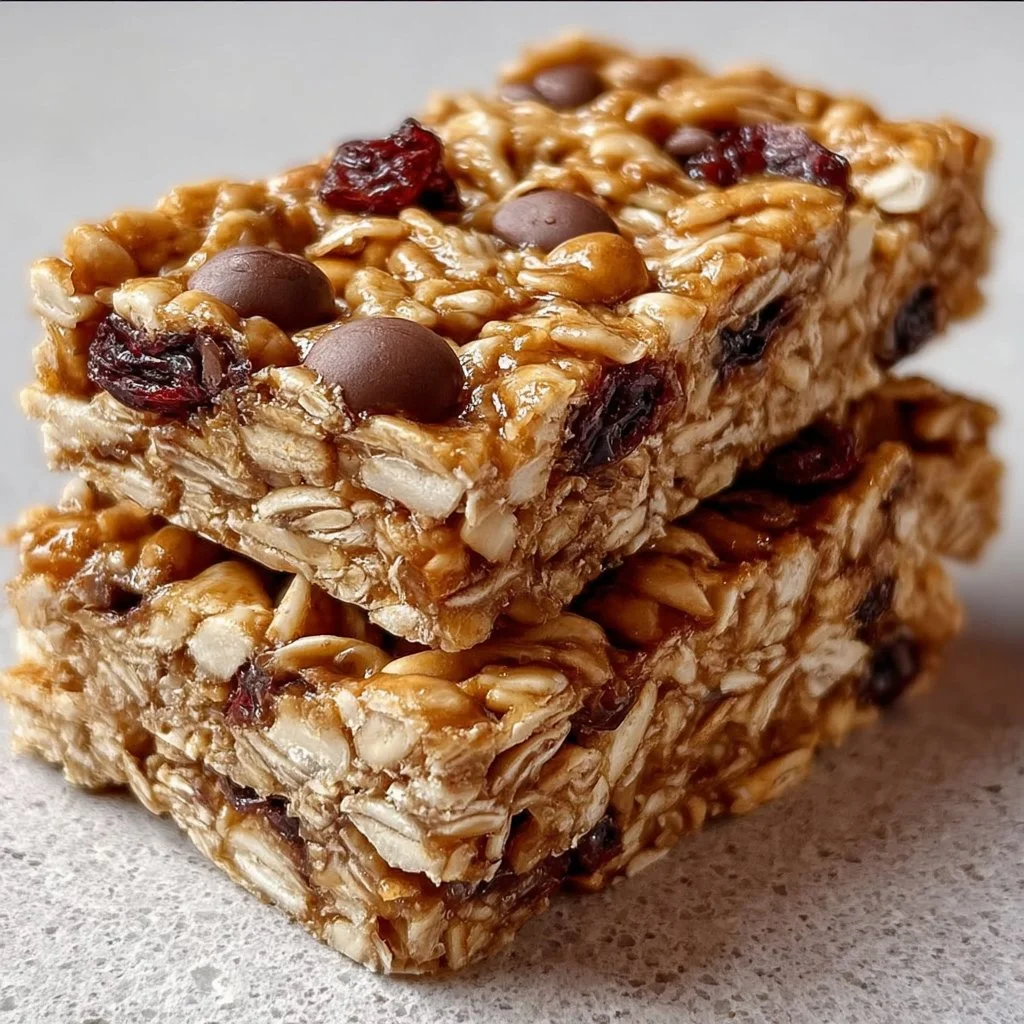
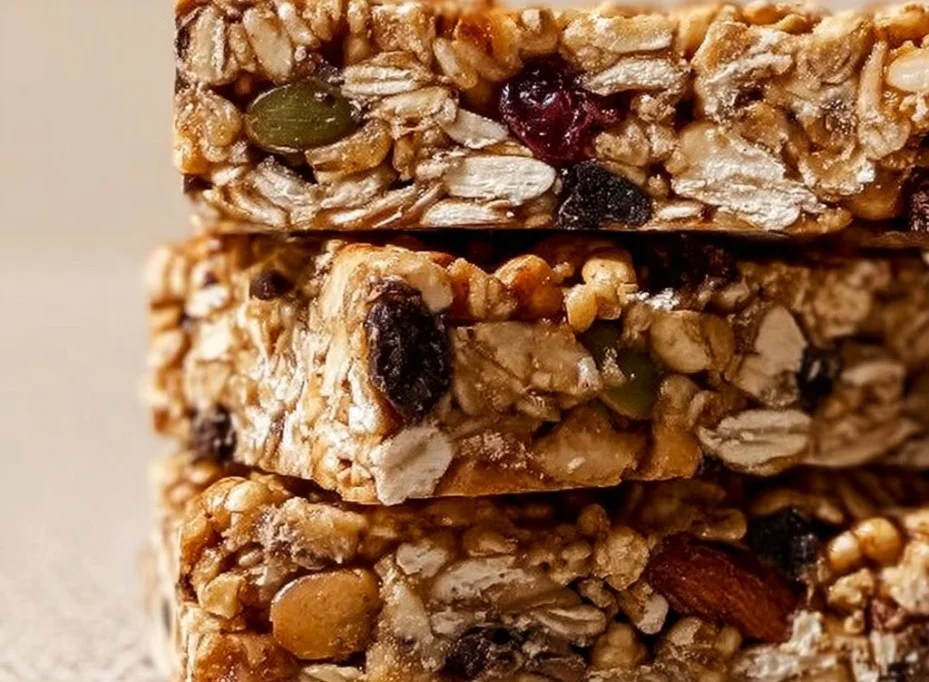
This is where the fun starts. Oats, nut butter, and a sticky sweetener are the trio that holds everything together — classic, comforting, reliable. I like old-fashioned rolled oats for chew; quick oats work if you’re in a rush. Peanut butter is my go-to, almond is dreamy, sunflower seed butter is a brilliant nut-free swap. Add-ins? Dried fruit, chocolate chips, seeds, puffed rice — mix it up, have fun. Health-wise, oats bring fiber, nut butter brings protein and healthy fats (casual note, not a lecture), seeds give crunch and nutrients. I buy bulk oats and seeds at my local co-op and nut butter at the grocery store when it’s on sale — cost-conscious tip: buy larger tubs of nut butter or use store brand. Experimentation encouraged. Really. MAKE IT YOURS.
Quick Process Overview
Get ready — this is simple but sensory and satisfying. First, warm the sticky stuff (3–4 minutes) so it blends — it should smell slightly toasted, very cozy. Don’t worry if the mixture seems loose at first; it firms as it cools. Next, mix oats and add-ins — you’ll see the texture come together, it’s so pretty, so satisfying, that crisp-chewy contrast, yes!! Press firmly into a lined pan (use a spatula or your hands — wet them to stop sticking). Chill for at least 30 minutes (I know, impatience is real, but worth it). Slice with a sharp knife; wipe it between cuts for neat bars. Trouble? If bars fall apart, remelt a little more nut butter and drizzle, press again, chill — problem solved. If too sticky, refrigerate a bit longer. Timing: active time ~15 min, chill time 30–60 min. Sensory check: glossy top, fragrant nut butter, audible snap when you bite. You got this.
Top Tips & Tricks
Keep things simple: measure with a mug if you must. Make-ahead: these hold in the fridge for up to 2 weeks (honest!), and in the freezer for 3 months — thaw in a lunchbox. Storage: wrap individually or stack with parchment to prevent sticking. Reheating? Not necessary — but a few seconds in the microwave warms them up beautifully if you like softer bars. Batch cooking works great: double the recipe and free up mornings for coffee and calm. Kid-friendly? Chop add-ins small, let kids press mixture into the pan (they LOVE that), reward them with a sticker or two (teacher Celine voice: positive reinforcement!). If you want crunch, add puffed rice last so it stays light. Also, note: sometimes I forget salt — don’t forget a pinch (it wakes everything up).
Serving Ideas You’ll Adore
Serve with a big glass of milk or a mug of coffee for adults — morning fuel, yes please. Pack one with a banana and a small yogurt for a balanced lunchbox. Stack on a picnic plate with fresh fruit for an easy dessert or snack spread. I love them sliced thin for toddler-friendly portions, or thick as an energy bar for hikes. Leftovers? Crumble into yogurt or on top of smoothie bowls for instant texture. Presentation tip: wrap in wax paper and tie with twine for a sweet gift. Try them warm or chilled. You’ll love how versatile they are. So many options. So many options.
Frequently Asked Questions
Yes, honey works fine if you’re not vegan, it gives a slightly different flavor but still sticky and delicious.
Use sunflower seed butter or soy nut butter and swap nuts for extra seeds or puffed rice, easy and safe for nut-free needs.
Absolutely, fold in mini chips after the mixture cools a touch so they don’t melt into a puddle, yum.
They’re best chilled if your kitchen is warm; at cool room temp they’re fine for a day, otherwise pop in the fridge.
You can, but then they’re not “no bake” — if you do, watch closely, they brown fast; this recipe is happiest unbaked.
These bars are simple, homemade, and truly comforting — you’ll be surprised how addictive they are, in a good way, in the best way. Try them, tweak them, tell me what you added (pics please!!!), ask questions if you need help, and share your results on Instagram or Pinterest so I can see (I really want to see). You can do this — you will do this — and then what will you make next?

No Bake Granola Bars
Ingredients
Base Ingredients
- 2 cups old-fashioned rolled oats Quick oats can be used in a rush.
- 1 cup nut butter (peanut, almond, or sunflower seed butter) Use sunflower seed butter for nut-free option.
- 1/2 cup sticky sweetener (maple syrup or honey) Honey can be used if not vegan.
Add-Ins (optional)
- 1/2 cup dried fruit, chocolate chips, seeds, puffed rice Customize to your liking.
Instructions
Preparation
- Warm the nut butter and sweetener together on low heat for 3-4 minutes until blended.
- In a large mixing bowl, combine the oats and any optional add-ins.
- Pour the warm mixture over oats and mix until fully combined.
Assembly
- Press the mixture firmly into a lined pan using a spatula or your hands (wet them to prevent sticking).
- Chill for at least 30-60 minutes until set.
- Slice into bars with a sharp knife, wiping it between cuts for neat edges.


