

While we have provided a jump to recipe button, please note that if you scroll straight to the recipe card, you may miss helpful details about ingredients, step-by-step tips, answers to common questions and a lot more information that can help your recipe turn out even better.
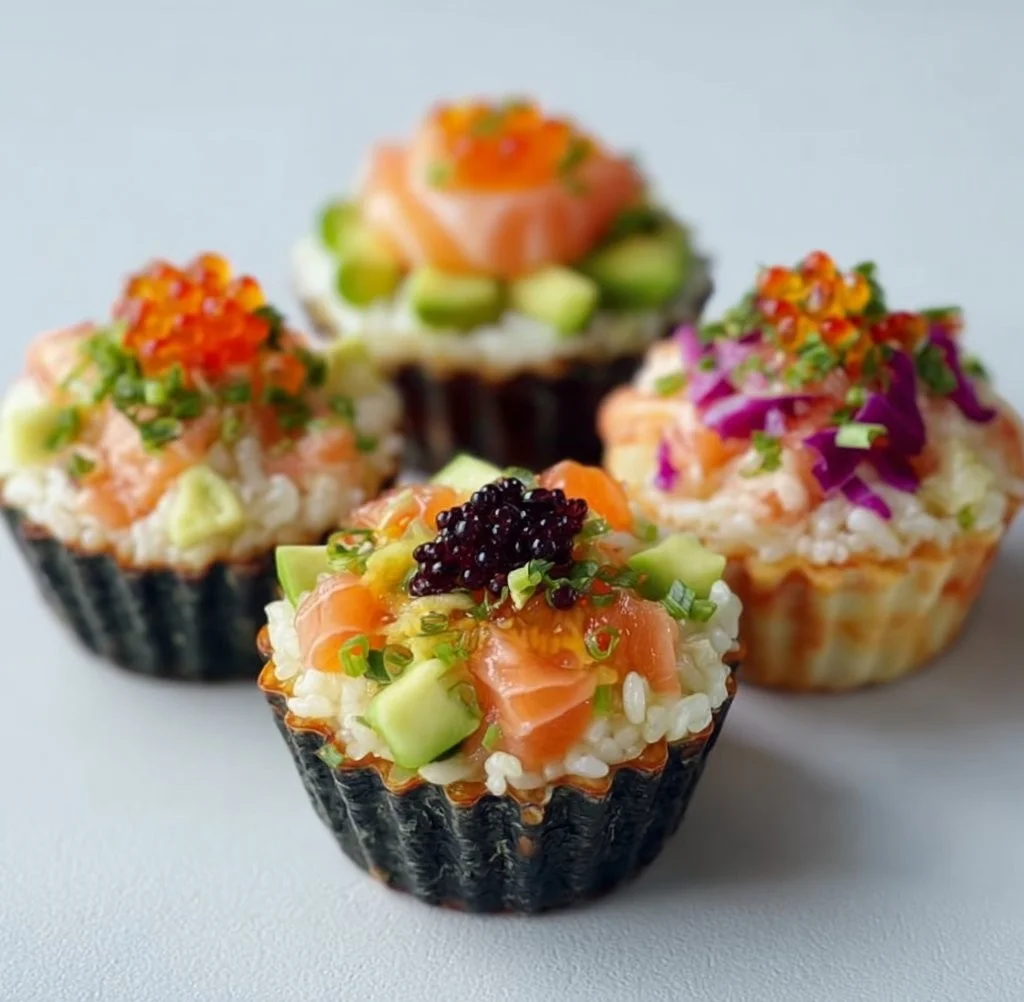
Sushi Cups are my kind of quick dinner magic: handheld, colorful, and just a little playful. I say Sushi Cups twice because yes, they deserve that small cheer. These little bowls of rice and fresh veg come together fast, are great for meal prep or last-minute guests, and they make picky eaters curious (win!). I often make Sushi Cups on a weekday when I want something that feels special but is actually very simple, and I’ll admit, I sometimes eat them standing over the counter. If you like easy handheld bites, also check out my chocolate peanut butter cups recipe for a sweet finishing touch!
Why these feel like a little victory
Sushi Cups are fun, adaptable, and forgiving, and they look impressive without a lot of fuss. They hit the satisfying textures: tender seasoned rice, crisp toasted nori, cool cucumber, silky avocado, and an optional pop from shrimp or crab. They are fast for weeknights, great for parties, and perfect for picky people who like to build their own bites. You get flavor, color, and a neat portion control moment, all in one. And honestly, who does not like food you can eat with your hands? It feels casual but thoughtful, and that’s exactly my vibe.
Ingredients
- 1 cup sushi rice
- 1 1/4 cups water
- 2 tablespoons rice vinegar
- 1 tablespoon sugar
- Salt to taste
- Nori sheets, cut into small squares
- Cucumber, diced
- Carrots, julienned
- Avocado, diced
- Cooked shrimp or crab meat (optional)
- Soy sauce for serving
A few quick notes: you can swap brown sushi rice if you want a nuttier chew, though cooking times change. For vegan cups, skip the seafood and add marinated tofu or pickled ginger. Buying sushi rice and nori at an Asian market saves a few dollars, but most supermarkets carry them now. Budget tip: use leftover rotisserie chicken if you want protein without paying for seafood. (I do this more than I admit!)
Process overview
-
- Rinse the sushi rice under cold water until the water runs clear. Combine the rice and water in a rice cooker and cook according to the manufacturer’s instructions. Once cooked, let it cool slightly.
-
- In a small bowl, mix rice vinegar, sugar, and salt until dissolved. Pour it over the cooked rice and mix gently to combine.
-
- Preheat the oven to 350°F (175°C).
-
- Lightly toast the nori squares in the oven for about 3-5 minutes until crisp.
-
- In small cups or bowls, layer the sushi rice, followed by nori squares, diced cucumber, julienned carrots, diced avocado, and the optional seafood.
-
- Serve immediately with soy sauce on the side.
Walkthrough: start with the rice because it takes the longest, but it is so easy if you use a rice cooker. When the rice is warm but not hot, stir in the vinegar mix; you want the vinegar to soak in but not steam off. Toasting the nori makes it crisp and less bendy, so your cups have structure and a nice snap. Layering is forgiving; press gently so each cup holds together but does not turn into a rice patty. Timing tip: the nori is happiest served soon after toasting, so toast close to assembly time. If your rice seems sticky, wet your hands slightly when scooping, that little trick helps. If something feels off, taste the rice alone—sometimes it just needs a whisper more vinegar or salt.
Tips & tricks
Think like a teacher: set up a small assembly station with rice, toasted nori, and bowls of toppings, and let family members build their own. For storage, keep rice and toppings separate in the fridge and assemble within 24 hours for best texture. Reheating is tricky because nori gets soft; I prefer cold or room temp Sushi Cups, but if you must, briefly crisp the nori in the oven. Batch cooking works great: make a double batch of rice and store in an airtight container, portioning as needed. If you want more savory punch, add a drizzle of sesame oil or a sprinkle of furikake. Also, if you like a baked variant, try a spicy salmon twist, similar to my spicy salmon sushi bake, the flavors translate nicely into a crowd-pleasing option.
Serving ideas
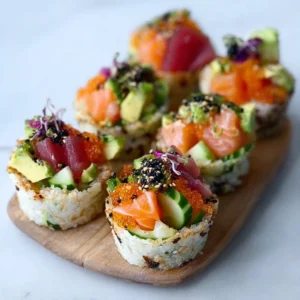
Serve Sushi Cups as a colorful lunch, a party appetizer, or a picky-eater dinner option. Pair them with edamame, a simple seaweed salad, or miso soup for a fuller meal. They are GREAT for potlucks because they travel well when assembled just before serving. For kids, offer a few dipping sauces and let them experiment. Leftovers are fun: mix everything into a bowl for a deconstructed sushi bowl the next day. If you are throwing a party and want more handheld ideas, I have a whole roundup of fun recipes here that pair well with Sushi Cups, check my party food round-up for inspiration.
FAQ
You can in a pinch, but sushi rice has a specific texture and stickiness that helps the cups hold; regular short grain will work best, not long grain though.
Rice and toppings can be prepped a day ahead, store them separately, and assemble just before serving for best texture; nori should be toasted right before if you want it crisp.
Yes, very much so; skip raw fish, use cooked shrimp or chicken, and make a mild soy dip—kids like building their own cups and trying tiny amounts first.
If too sticky, gently fluff with a fork and cool slightly, use slightly wet hands to portion; if too dry, sprinkle a teaspoon of warm water, cover briefly, and gently mix to add moisture back.
Freezing assembled cups is not recommended because nori loses texture and avocado suffers; freeze rice separately if needed, but fresh assembly is best.
I hope you get a little thrill from making these—they are simple but feel special. Try different toppings, have fun with it, and tell me which combo became your favorite! Share a photo if you make them, please, I really like seeing real-life food photos (yes, I am that person).
Sushi Cups
Ingredients
For the sushi rice
- 1 cup sushi rice Brown sushi rice can be substituted for a nuttier flavor.
- 1.25 cups water Adjust according to rice cooker instructions.
- 2 tablespoons rice vinegar
- 1 tablespoon sugar
- to taste salt
For the toppings
- Nori sheets cut into small squares Toasted for added crispness.
- 1 medium cucumber Diced.
- 1 medium carrot Julienned.
- 1 medium avocado Diced.
- Optional cooked shrimp or crab meat For added protein.
For serving
- to taste soy sauce For dipping.
Instructions
Preparation of Rice
- Rinse the sushi rice under cold water until the water runs clear.
- Combine the rice and water in a rice cooker and cook according to the manufacturer's instructions.
- Once cooked, let the rice cool slightly.
Mixing Ingredients
- In a small bowl, mix rice vinegar, sugar, and salt until dissolved.
- Pour it over the cooked rice and mix gently to combine.
Toasting Nori
- Preheat the oven to 350°F (175°C).
- Lightly toast the nori squares in the oven for about 3-5 minutes until crisp.
Assembly
- In small cups or bowls, layer the sushi rice, followed by nori squares, diced cucumber, julienned carrots, diced avocado, and the optional seafood.
- Serve immediately with soy sauce on the side.


