

While we have provided a jump to recipe button, please note that if you scroll straight to the recipe card, you may miss helpful details about ingredients, step-by-step tips, answers to common questions and a lot more information that can help your recipe turn out even better.
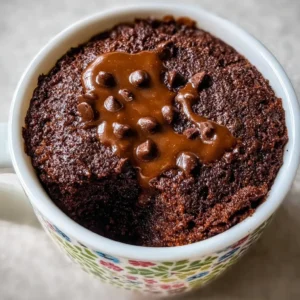
Oh my gosh — MICROWAVE MUG BROWNIE right now!!! The microwave mug brownie is SO EASY and so FUDGY and unbelievably fast — microwave mug brownie in a minute, yes really!!! If you need a single-serving chocolate fix, the microwave mug brownie is your new best friend, and you can make it with pantry staples in literally minutes. Want decadent, want quick, want low-effort? You got it. You can do this! Who doesn’t love a warm brownie in a cup? Who doesn’t love fudgy, gooey, chocolatey comfort? Who doesn’t want dessert pronto?
Quick benefits in prose: single-serve so no sharing necessary (but ok share if you want), pantry-friendly ingredients, almost zero cleanup, perfect for late-night cravings, perfect for meal preppers who want portion control. I stumbled on this as a former teacher on duty late at night grading papers and starving — tried a mug brownie hack and it changed everything (true story!). Also, if you like to bake and then bake some more, try my gourmet brownie cookies for a bake-ahead option that’s a bit more involved but oh so worth it.
Why You’ll Fall Hard for This Mug Brownie
Yes, you’ll love it. You’ll REALLY love it. It’s tiny but mighty, it’s fast but decadent, it’s forgiving and FUN and perfect for picky kids, for solo snackers, for last-minute guests (are you hosting? yes, you can do this!), and for people watching calories but craving chocolate — portion control, yay. The texture is surprisingly deep-fudge, dense and soft, not cake-y unless you overcook it (don’t do that). It’s cheap, pantry-rescue friendly, and wildly customizable so you can make it yours, make it healthier-ish if you want, or totally indulgent. Repetitive praise? Yes. Because it deserves it. So good, so good.
Ingredients
- 4 tablespoons all-purpose flour
- 4 tablespoons sugar
- 2 tablespoons cocoa powder
- 1/8 teaspoon salt
- 2 tablespoons vegetable oil
- 3 tablespoons water
- 1/4 teaspoon vanilla extract
Spotlight: cocoa powder is the MVP here — unsweetened Dutch-process gives a deeper chocolate flavor, but regular natural cocoa is totally fine. Substitutions: swap the vegetable oil for melted coconut oil or even melted butter for richer flavor; use applesauce for a lighter swap (texture will change). For a keto-ish version, try a sugar substitute and almond flour tweak (experiment!). I buy my cocoa and flour in bulk at the local Austin co-op to save money — cost-conscious tip: pantry staples like these are cheap per serving, less than a coffee. Encourage experimentation: throw in a sprinkle of cinnamon, a spoonful of peanut butter, or a few dark chocolate chips. (My weird favorite? A pinch of espresso powder — deepens the chocolate.) Totally flexible. Totally forgiving.

Quick Process Overview — The EASIEST Steps
- In a microwave-safe mug, combine the flour, sugar, cocoa powder, and salt. Stir until well mixed.
- Add the vegetable oil, water, and vanilla extract. Mix until smooth and there are no lumps.
- Microwave on high for 1 minute. Keep an eye on it to ensure it doesn’t overflow.
- Let it cool for a minute before enjoying your fudgy brownie straight from the mug!
Okay, now a little more: Step 1 — make sure the dry mix is lump-free. Quick whisk with a fork. No fuss. Step 2 — mix until smooth; you’ll see the batter go glossy, that’s the good sign. Step 3 — microwave times vary by wattage, so watch it the first time (seriously, watch!). 60 seconds is my baseline in a 1000W microwave; yours might need 50–70 seconds. It should puff slightly but stay moist-looking in the center — don’t overcook. Step 4 — cooling for a minute is CRITICAL (hot mug alert), and it lets the fudgy center set up. If it seems too wet, give it 5–10 more seconds. Don’t worry — it’s forgiving!!! Troubleshooting: if it’s dry, you overcooked; next time reduce time by 10–15 seconds. If too gooey after cooling, add 10 seconds.
Tips & Tricks from a Former Teacher (You Can Do This!)
Keep a mug just for microwaving — less anxiety about overflow. Make-ahead: you can prep the dry mix in a small jar and stash it in the pantry for instant brownies; add wet ingredients and zap when ready. Storage: leftovers (if any) can go in the fridge in the mug or transferred to a container for 2–3 days; reheat briefly in the microwave for 10–15 seconds. Reheating: 10 seconds at a time — watch it! Batch cooking: double or triple dry mixes in jars for a week of quick desserts — teacher-tested crowd pleaser. Kid-friendly twists: let kids stir in sprinkles or mini chips before microwaving (supervised!). Pro tip: a pinch of salt brings out the chocolate. Want a different vibe? I sometimes make a red velvet spin — try my red velvet brownies recipe when you want something more showy.
Serving Ideas That Make It Feel Special
Serve straight in the mug with a scoop of ice cream on top for that hot-and-cold contrast. Drizzle with caramel or peanut butter. Sprinkle flaky salt for grown-up sweetness. Plate it (yes, you can, if presentation matters) and dust with powdered sugar for casual company. It’s perfect for weeknight treats, birthday night-ins, rainy afternoons, or as a reward after a long teacher-grade marathon (I know the feeling). Leftovers? Crumble into yogurt or over oatmeal for instant chocolate breakfast (don’t judge, it’s delicious). Try tiny marshmallows and broil briefly if you have a minute and want a s’mores vibe. So many pairings. So many ways to love it. So many happy faces.
Frequently Asked Questions
Yes, milk makes it richer and slightly more cake-like — totally delicious, go for it!
Pick a larger mug next time (tall, not wide), and reduce microwave time by 10–15 seconds; don’t panic, it happens.]
Not as written; swap a 1:1 gluten-free flour blend and it should work fine — results may vary a tiny bit, but it’s a good swap.]
Of course — stir in a tablespoon or sprinkle on top before microwaving for melty pockets of joy.]
Very fudgy if you stop at the right time; overcook and it gets cakey — watch it, test it, adjust.]
This is simple, and delicious, and YOU CAN DO THIS!!! Tell me how yours turned out, ask questions below, snap a pic and tag me on social (I love seeing it), share the joy, share the mug, or don’t share — I won’t judge. Big hugs from Austin — Celine, signing off with chocolate on my mind, always.
Microwave Mug Brownie
Ingredients
Dry Ingredients
- 4 tablespoons all-purpose flour
- 4 tablespoons sugar
- 2 tablespoons cocoa powder Use unsweetened Dutch-process for deeper flavor.
- 1/8 teaspoon salt A pinch of salt enhances the chocolate flavor.
Wet Ingredients
- 2 tablespoons vegetable oil Can substitute with melted coconut oil or butter.
- 3 tablespoons water Can use milk for a richer flavor.
- 1/4 teaspoon vanilla extract
Instructions
Preparation
- In a microwave-safe mug, combine the flour, sugar, cocoa powder, and salt. Stir until well mixed.
- Add the vegetable oil, water, and vanilla extract. Mix until smooth and there are no lumps.
Cooking
- Microwave on high for 1 minute, keeping an eye on it to ensure it doesn’t overflow.
- Let it cool for a minute before enjoying your fudgy brownie straight from the mug.


