

While we have provided a jump to recipe button, please note that if you scroll straight to the recipe card, you may miss helpful details about ingredients, step-by-step tips, answers to common questions and a lot more information that can help your recipe turn out even better.
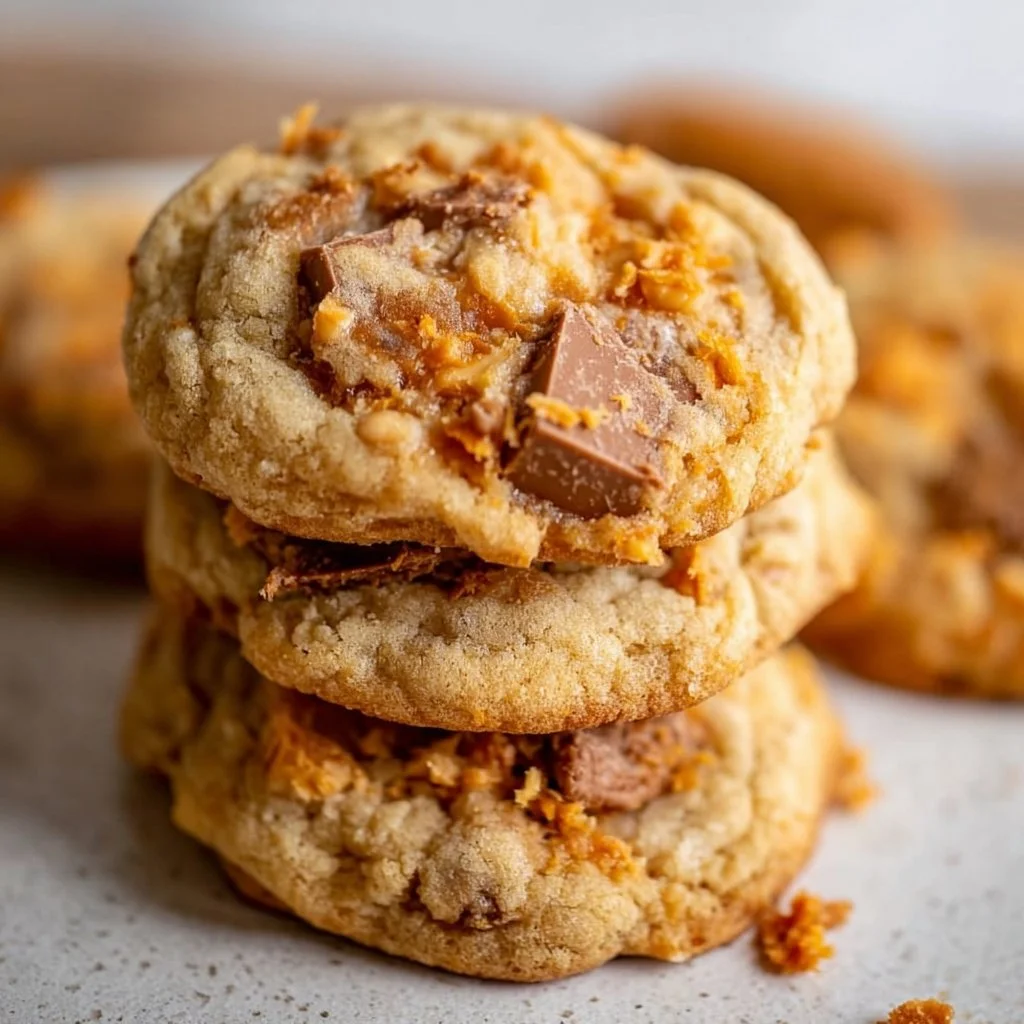
Peanut Butter Butterfinger Cookies are exactly the kind of cookie that makes me smile the second they come out of the oven. I say the name twice because I cannot stop thinking about the crunchy Butterfinger bits inside soft peanut butter dough. Quick to mix, quick to bake, and utterly snackable — these Peanut Butter Butterfinger Cookies are a busy-week treat that also feels a little decadent. Want a cookie that works for lunchboxes, after-school chaos, and last-minute hosting? Read on, friend, trust me, this one delivers!
Why this cookie will steal your heart
I get asked often why I bake, and these cookies explain it: simple ingredients, big payoff, and a texture contrast that makes your brain do a tiny happy dance. The peanut butter gives depth and chew, the sugar crust forms just enough crinkle, and those Butterfinger pieces add crunchy pockets of candy that you did not know you needed. They are nostalgic in a good way, and also oddly sophisticated when you serve them next to coffee. Want something that freezes well and thaws beautifully? Check. Need a recipe kids can help with? Also check. Who doesn’t like a cookie that hits both comfort-food and party-food notes at once?
Ingredients you’ll need
- 1 cup creamy peanut butter,
- 1/2 cup sugar,
- 1/2 cup brown sugar,
- 1 large egg,
- 1 teaspoon vanilla extract,
- 1 cup all-purpose flour,
- 1/2 teaspoon baking soda,
- 1/2 cup Butterfinger candy bars, chopped
A few quick notes on the ingredients: you can swap crunchy peanut butter if you love crunch, but I prefer creamy for a more tender cookie. If you want a nuttier finish, toast the peanut butter for a minute (careful, it heats fast). Butterfinger bars are easy to find in most grocery candy aisles, or you can buy a bag of mini bars and chop them up. On a budget? Buy a multi-pack of candy bars when they’re on sale and freeze extras. Want a peanut-free version for school lunches? Try sunbutter in place of peanut butter (I have tested this, and it works okay).
How the process goes, simply
-
- Preheat your oven to 350°F (175°C).,
-
- In a large bowl, mix together peanut butter, sugar, brown sugar, egg, and vanilla until well combined.,
-
- In another bowl, whisk together flour and baking soda. Gradually add the dry mixture to the peanut butter mixture, stirring until blended.,
-
- Fold in the chopped Butterfinger pieces.,
-
- Drop spoonfuls of dough onto a baking sheet lined with parchment paper.,
-
- Bake for 10-12 minutes or until the edges are lightly golden.,
-
- Allow to cool on the baking sheet for a few minutes before transferring to a wire rack to cool completely.
Okay so a little explanation around those steps: preheat first, always, because I hate waiting for ovens to catch up. When you mix the wet ingredients, scrape the bowl well, and don’t overbeat—just combine. The gradual addition of flour keeps the dough from getting tough (gentle folding is your friend). Folding in the Butterfinger pieces is the fun part, sprinkle them in and don’t overwork the dough, you want candy pockets not paste. Drop spoonfuls generously; these spread a little but not too much. Baking time gives you a soft center with crisp edges, watch the first batch closely because ovens vary. Let them rest briefly on the sheet so they set, then transfer to a rack, this keeps bottoms from getting soggy. If a cookie looks underbaked, it often firms up off the heat, so don’t panic.
Tips & tricks from a former teacher who bakes a lot
Make a double batch and freeze half of the raw dough rolled into balls; when you need cookies, bake from frozen adding an extra minute or two, GAME-CHANGER! Store baked cookies in an airtight container with a slice of bread to keep them soft, or freeze for up to three months and thaw on the counter. If Butterfinger bits migrate toward the bottom while baking, gently press a few extra pieces on top right after they come out — it helps with presentation and texture. Use parchment for an easy cleanup and consistent baking, and if you like a chewier cookie, swap half the white sugar for an extra tablespoon of brown sugar. I wrote a longer note about pairing cookies on my site once, not to sound dramatic, but it changed how I think about snacks!!!
Also, for a fun twist try adding a pinch of flaky sea salt right after baking, it highlights the candy and peanut butter in a surprising way. Need to bake with kids? Give them the job of chopping the Butterfingers (safely) and dropping dough — they love feeling useful and cookies are great motivators.
If you like mixing sweet with unexpected textures, check this recipe for blueberry cheesecake cookies for another fun cookie idea.
Serving ideas and occasions
Serve these warm with cold milk for old-school happiness, or alongside a strong coffee for an afternoon pick-me-up. They make a great addition to cookie platters at holiday swaps, perfect for school parties (if peanut-safe), and lovely tucked into care packages. For a small party, place them on a platter with a bowl of extra chopped Butterfinger for guests to sprinkle on top. Leftovers? Crumble them over vanilla ice cream or layer into a no-bake dessert for a playful crunch. Want a mini version? Use a teaspoon to make bite-sized cookies that disappear FAST.
FAQ
Yes, you can use chunky peanut butter if you like extra nut texture; the cookies will be a touch chunkier and very satisfying.
Store at room temperature in an airtight container for up to 4 days, or freeze baked cookies for up to three months and thaw on the counter when needed.
Absolutely, roll dough into balls and freeze them on a tray, then transfer to a bag; bake from frozen adding a minute or two to the bake time, it works well for planning ahead.
If they melt slightly, it still tastes great; to keep more texture, fold them in gently and press a few onto the tops after baking for extra crunch.
Only if your school allows peanut products; otherwise try sunbutter as a substitute to make them nut-free for many schools.
Thanks for reading my slightly chatty, slightly opinionated take on Peanut Butter Butterfinger Cookies. If you try them, tell me what you changed, or share a photo — I actually love seeing your baking attempts, no pressure though! If you think a friend needs a cookie boost, send this their way. Happy baking, and hey, save a cookie for me if you can!!!

Peanut Butter Butterfinger Cookies
Ingredients
Main Ingredients
- 1 cup creamy peanut butter You can swap for crunchy peanut butter if desired.
- 1/2 cup sugar
- 1/2 cup brown sugar Use light or dark brown sugar.
- 1 large egg
- 1 teaspoon vanilla extract
- 1 cup all-purpose flour
- 1/2 teaspoon baking soda
- 1/2 cup Butterfinger candy bars, chopped You can also use mini Butterfinger bars.
Instructions
Preparation
- Preheat your oven to 350°F (175°C).
- In a large bowl, mix together peanut butter, sugar, brown sugar, egg, and vanilla until well combined.
- In another bowl, whisk together flour and baking soda. Gradually add the dry mixture to the peanut butter mixture, stirring until blended.
- Fold in the chopped Butterfinger pieces.
- Drop spoonfuls of dough onto a baking sheet lined with parchment paper.
- Bake for 10-12 minutes or until the edges are lightly golden.
- Allow to cool on the baking sheet for a few minutes before transferring to a wire rack to cool completely.


