
While we have provided a jump to recipe button, please note that if you scroll straight to the recipe card, you may miss helpful details about ingredients, step-by-step tips, answers to common questions and a lot more information that can help your recipe turn out even better.
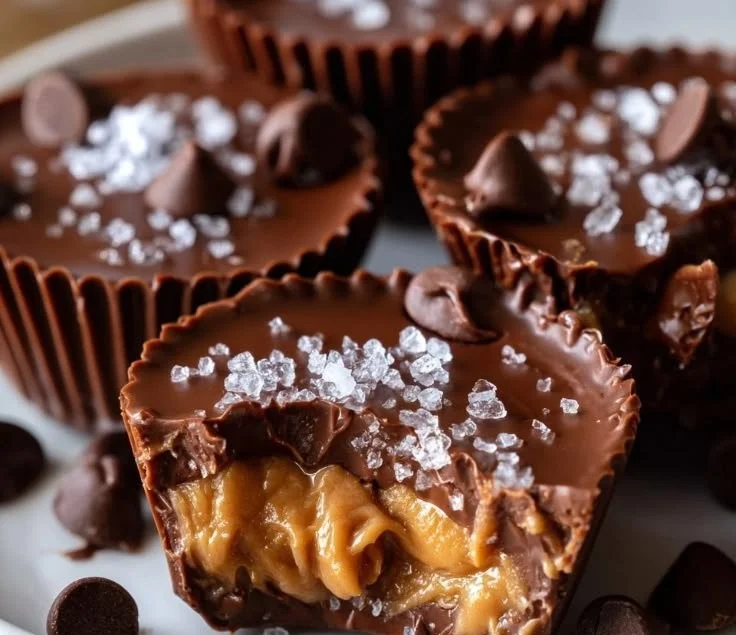
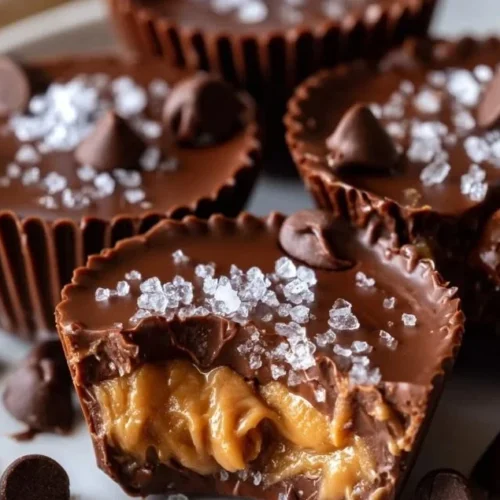
Chocolate Peanut Butter Cups are my go-to quick treat when I want something nostalgic, simple, and seriously satisfying. I mention Chocolate Peanut Butter Cups twice because yeah, I am excited about them. They take minutes to assemble, chill fast, and disappear even faster. Need a last-minute dessert for school pickup, a small-batch bake for friends, or an easy snack to meal prep for the week? This is it, trust me (I taught a third grade class and survived many snack days). Also, if you like cozy mains, check out a recipe I love for a different kind of comfort, my butternut squash and spinach lasagna, because why not plan dinner and dessert in the same brain swoop.
Why you will fall for these little cups
They are tiny, portable, and packed with two of the best flavors ever, chocolate and peanut butter. The texture contrast is lovely, smooth chocolate, creamy peanut butter, a bit of powdered sugar crunch if you like that sort of thing. They are fuss free, no oven, no special tools, which is heaven on busy afternoons. Perfect for making a small batch or scaling up for a party, and they store well in the fridge so they feel like a gift you can keep giving to yourself. Emotional bonus: they hit that childhood nostalgia spot, but in a grown up way, so you feel a little smug and very comforted. Practical bonus: ingredients are pantry staples and usually cheap, so yay for budget friendly treats!!
Ingredients
- 1 cup chocolate chips
- 1/2 cup creamy peanut butter
- 1/4 cup powdered sugar
- 1/2 teaspoon vanilla extract
- Cupcake liners
A few notes after the list: you can use semi sweet, milk, or dark chocolate chips, so swap based on your sweet tooth. If you need a nut free version, try a sunbutter instead of peanut butter, though the flavor will change. For powdered sugar, I buy a small bag at the budget store and it lasts through many recipes. Cupcake liners are sold in bulk, or reuse silicone liners to save waste. Look for chocolate chips in the baking aisle, peanut butter near spreads, and powdered sugar on the top shelf in most supermarkets.

A quick look at the process
- Line a muffin tin with cupcake liners.
- Melt the chocolate chips in a microwave-safe bowl, stirring every 30 seconds until smooth.
- Spoon a small amount of melted chocolate into each cupcake liner, coating the bottom.
- In another bowl, mix the peanut butter, powdered sugar, and vanilla until well combined.
- Add a spoonful of the peanut butter mixture on top of the chocolate layer in each liner.
- Cover the peanut butter with another spoonful of melted chocolate.
- Refrigerate until set, about 30 minutes.
- Enjoy your homemade Chocolate Peanut Butter Cups!
Okay, now some friendly commentary around those steps. The numbered steps above are the heart of this, super straightforward. When melting the chocolate, stir often so it does not seize, and if it thickens a little, add a teaspoon of oil or a splash of milk to loosen it up. Spoon a thin first layer of chocolate so the cup has a neat bottom, then thicker on top if you like extra chocolate. Timing will vary by fridge, but 30 minutes is usually enough; if you are impatient (I get it), pop them briefly in the freezer for 10 minutes and they will set fast. Want them shiny? Warm a spoon and smooth the top quickly before chilling. Need inspiration for pairing? Read on. Also, if you want to mix flavors, stir a pinch of sea salt into the peanut butter, it makes the chocolate POP. And if you are wondering about making more at once, use a muffin tin and multiple liners and you are in business. For something different, check how I combine savory squash flavors in another simple bowl idea here: butternut squash garlic herb steak bowls.
Tips & tricks from a former teacher who loves shortcuts
Keep things tidy by preparing a small station: one bowl for chocolate, one for peanut butter mix, spoons, liners. Store finished cups in an airtight container in the fridge for up to two weeks, if they last that long, ha. Freezing works well too, just layer parchment between rows, freeze, then transfer to a bag; thaw a few minutes before eating. Batch cooking is easy, double the recipe and you have gifts ready for neighbors or a quick dessert stash. If your peanut butter mixture seems too loose, add a touch more powdered sugar, a teaspoon at a time. And another teacher tip: label the container with the date, because busy households forget these things.
Serving ideas
Serve them on a small plate with a sprig of mint if you want to be fancy, or sandwich one between two cookies for a playful twist. They are great with coffee or a cold glass of milk, and they make a cute addition to a kids party snack table. Holiday box favors? Yes. After-school emergency snack? Absolutely. Leftovers can be chopped and stirred into ice cream, sprinkled over oatmeal, or melted and used as a dip for strawberries. Personal preference: I like mine slightly chilled, but room temperature brings out the peanut butter creaminess.
FAQ
Yes, you can, but natural peanut butter can be runnier, so you may need a little more powdered sugar to get a scoopable filling, and it can change the sweetness balance, so taste as you go.
Not long in warm weather, probably an hour or two before they get soft; better to store them in the fridge for a few days or freeze for longer storage.
Absolutely, dark chocolate gives a richer, slightly less sweet contrast to the peanut butter and is my pick when I want something less candy like and more grown up.
Add a teaspoon of neutral oil or a little warmed cream and stir gently, that usually smooths it out; take care to melt slowly and stir often to avoid seizing in the first place.
Yes, very much so, they are simple to assemble with supervision and kids love the hands on part of spooning chocolate and filling the liners, plus they make a cute snack to pack for lunches.
Casual ending: if you make these Chocolate Peanut Butter Cups, tell me how they turned out, or post a photo, I love seeing real people try my recipes. Share with friends, stash a few in the fridge, and enjoy the tiny victories. Try them, tweak them, make them yours. Happy baking!
Chocolate Peanut Butter Cups
Ingredients
Chocolate Layer
- 1 cup chocolate chips Use semi-sweet, milk, or dark chocolate chips based on preference.
Peanut Butter Layer
- 1/2 cup creamy peanut butter Can substitute with sunbutter for a nut-free version.
- 1/4 cup powdered sugar Add more if the peanut butter mixture seems too loose.
- 1/2 teaspoon vanilla extract
Additional Materials
- 12 pieces cupcake liners Use disposable or reusable silicone liners.
Instructions
Preparation
- Line a muffin tin with cupcake liners.
- Melt the chocolate chips in a microwave-safe bowl, stirring every 30 seconds until smooth.
- Spoon a small amount of melted chocolate into each cupcake liner, coating the bottom.
- In another bowl, mix the peanut butter, powdered sugar, and vanilla until well combined.
- Add a spoonful of the peanut butter mixture on top of the chocolate layer in each liner.
- Cover the peanut butter with another spoonful of melted chocolate.
- Refrigerate until set, about 30 minutes.
- Enjoy your homemade Chocolate Peanut Butter Cups!


